 how-to
Construction Site Waste Sorting: Best Practices Guide
Table of Contents
- Why Construction Site Waste Sorting Matters
- Identifying Your Construction Waste Streams
- Building a Construction Waste Management Plan Template
- Setting Up On-Site Sorting and Designated Containers
- Roll-Off Dumpster Rental for Construction Sorting Success
- Hazardous Construction Waste Disposal Regulations and Compliance
- Measuring Waste Diversion and Reducing Costs
- Common Sorting Mistakes and How to Avoid Them
- Frequently Asked Questions
Last Updated: October 20, 2026
Why Construction Site Waste Sorting Matters
Construction and demolition waste is one of the largest waste streams in the country. How you handle debris affects your budget, timeline, and environmental impact. Sorting construction site waste properly keeps projects on schedule, reduces disposal costs, and recovers reusable materials.
Most construction managers treat waste as an afterthought: rent a dumpster, throw everything in, deal with overage fees later. Teams that separate waste streams from day one recover more materials, spend less on hauling, and avoid compliance headaches.
This guide covers the practical steps to build a waste sorting system that works, from setting up on-site sorting to choosing containers and measuring what you divert from the landfill.
Identifying Your Construction Waste Streams
Before you can sort, you need to know what you're dealing with. Construction and demolition waste breaks down into predictable categories. Knowing these categories upfront makes sorting faster and prevents contamination.
Common Construction and Demolition Waste Categories
Wood is the most abundant construction waste. Framing lumber, plywood, pallets, and trim can be reused or chipped for mulch.
Metal includes steel beams, rebar, copper wire, and aluminum. Metal has real scrap value.
Concrete and masonry come from demolition work, broken foundations, and removed walls. Concrete can be crushed and reused as aggregate for new projects.
Drywall (gypsum board) is common in interior work. It can be recycled into new drywall or soil amendments if kept dry and uncontaminated.
Asphalt from roofing or paving can be reclaimed and reused in new paving projects.
General waste includes packaging, insulation, roofing felt, and mixed debris. It's the most expensive to dispose of.
Cardboard and packaging should be flattened and bundled separately. Many recyclers accept clean cardboard at no cost.
Hazardous and Regulated Materials
Some materials require special handling and disposal. Identifying them early prevents fines and site shutdowns.
Asbestos appears in old insulation, floor tiles, roofing, and pipe wrap; buildings constructed before 1980 likely contain it. Hire a licensed abatement contractor, testing is required before demolition.
Lead paint is common in older buildings. Disturbing it creates dust, so containment and special disposal are required by law. Use certified lead-safe work practices.
Refrigerants and oils from HVAC systems, compressors, and hydraulic equipment must be recovered by licensed technicians before disposal.
Batteries, fluorescent lights, and electronic waste contain mercury or other toxins. They cannot go in regular dumpsters.
Treated wood that has been chemically treated for rot resistance contains copper or arsenic. It requires special disposal.
Understanding these categories prevents costly mistakes and keeps your crew safe.
Building a Construction Waste Management Plan Template
A waste management plan is your roadmap. It assigns roles, sets expectations, and keeps everyone accountable. The best plans are simple enough that workers follow them without confusion.
Planning Waste Management Before Work Begins
Start waste planning before the first nail is driven.
Step 1: List all waste types your project will produce. Walk through the scope of work. Demolition? New construction? Renovation? Each generates different waste.
Step 2: Identify your local disposal and recycling options. Not all facilities accept all materials.
Step 3: Calculate container needs. Estimate volume per waste stream, 50 tons of concrete needs concrete-sized containers; framing a house makes wood your largest stream.
Step 4: Set a target waste diversion rate. Decide what percentage of your waste you want to divert from the landfill.
Step 5: Plan your container layout. Sketch where containers will sit, accessible to workers but away from traffic and weather exposure.
Assigning Roles and Responsibilities
Sorting fails when nobody owns it. Assign specific people to specific tasks.
- Project manager: Oversees the waste plan and tracks performance.
- Site supervisor: Enforces sorting rules daily and addresses contamination.
- Crew leads: Train their teams on what goes where.
- Workers: Sort waste at the source, the moment they generate it.
Make the rules clear: post a diagram showing what goes in each container, train new workers on day one, and check containers daily. A mixed bin loses the material recovery value for that load.
Setting Up On-Site Sorting and Designated Containers
The physical setup determines whether sorting actually happens. Poor layout leads to contamination and confusion. Good layout makes sorting the easiest path.
Container Types and Placement Strategy
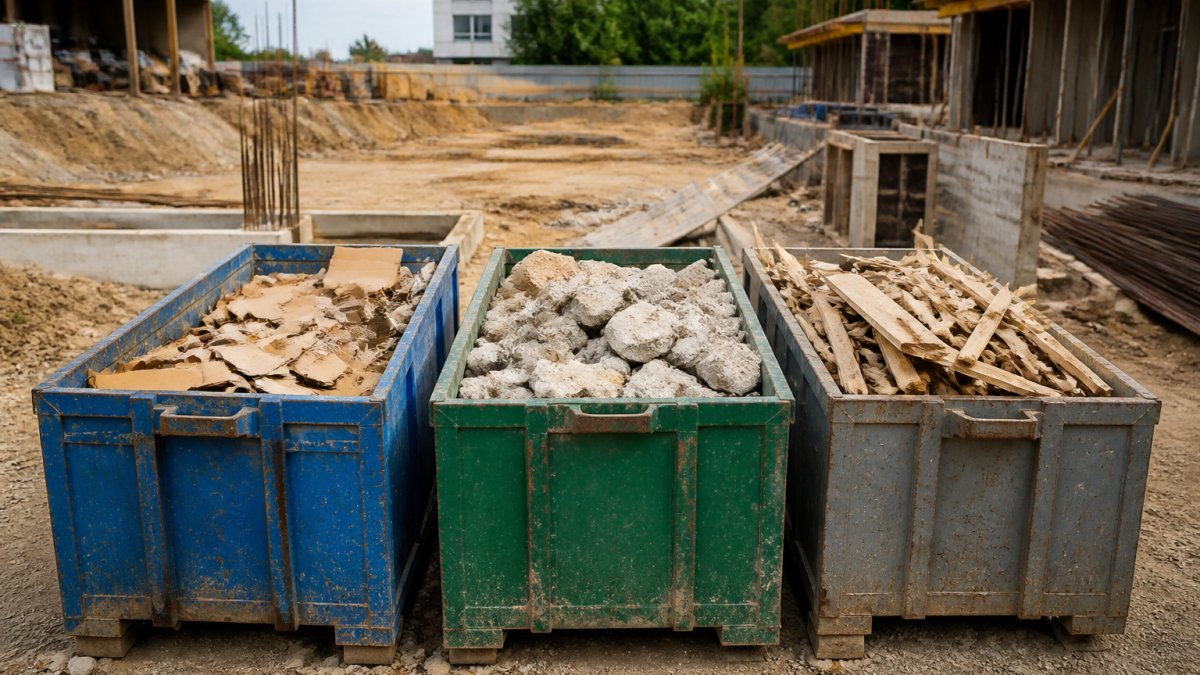
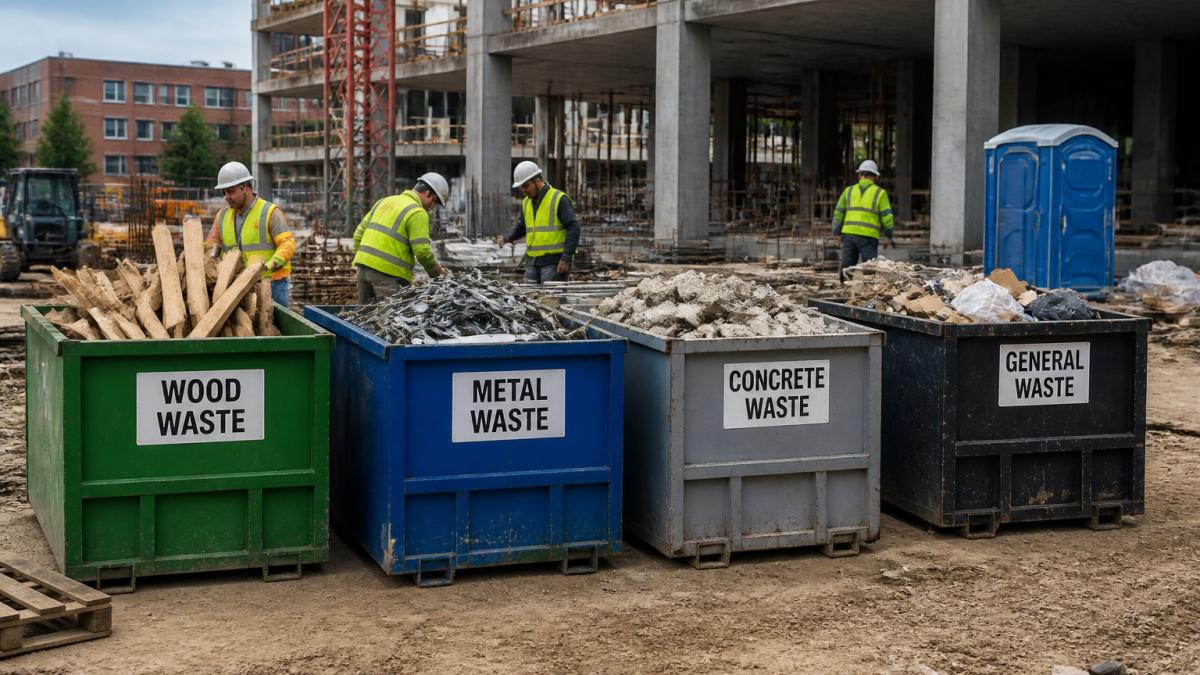
Labeled roll-off dumpsters are the standard for construction site waste sorting. They're large enough for volume, easy to swap, and available in sizes from 10 to 40 cubic yards. Different materials need different containers:
- Concrete and masonry: heavy-duty containers rated for dense materials
- Wood: standard dumpsters (wood is lighter)
- Metal: containers that can withstand sharp edges
- General waste: standard dumpsters
- Cardboard: open-top containers or compactors to save space
Placement matters. Put containers where workers generate waste, a wood container near framing, a concrete container near demolition rubble. The farther workers walk, the more likely they dump in the wrong bin.
Space containers at least 10 feet apart so you can see what's in each one. Arrange them in a line or grid, not scattered randomly. This makes the layout obvious and prevents confusion.
Containment strategy: Use spill containment under containers holding liquids or fine materials. Concrete dust and fine debris should be contained to prevent runoff.
Signage and Contamination Prevention
Clear signage is your first defense against contamination. "Wood Only" isn't enough, workers need to see what belongs and what doesn't.
Create visual signage that shows:
- The material name (WOOD, METAL, CONCRETE, etc.)
- What goes in (examples: "2x4s, plywood, trim, pallets")
- What doesn't go in (examples: "NO nails, NO paint, NO treated wood")
- Photos of acceptable materials if possible
Use color coding. Assign each waste stream a color. Paint the container or use colored tape. Workers recognize colors faster than reading signs.
Place signs at eye level on all sides of the container. Workers approach from different angles. They should see the label from any direction.
Contamination happens when workers throw mixed waste into one bin, liquids leak into recyclables, hazardous materials end up in general waste, or fine materials mix with larger items.
Prevent it by inspecting containers daily, removing contaminated loads immediately, retraining workers who violate sorting rules, and making sorting the easiest choice (containers close, signs clear, rules simple).
Roll-Off Dumpster Rental for Construction Sorting Success
Your hauler and container choice shape what you can recover. The right setup makes sorting profitable. The wrong setup makes it impossible.
Selecting the Right Dumpster Capacity
Container size depends on project scope and duration. Too small and you overflow. Too large and you pay for unused space.
For residential projects:
- Small renovations (kitchen, bathroom): 10-15 cubic yards
- Whole-house renovation: 20-30 cubic yards
- Full demolition: 30-40 cubic yards
For commercial projects:
- Light commercial fit-out: 20-30 cubic yards
- Major renovation: 30-40+ cubic yards
- Full demolition: 40+ cubic yards
For demolition:
- Single-family home: 30-40 cubic yards
- Multi-unit building: 40+ cubic yards (may need multiple containers)
Ask your hauler about weight limits. A 20-yard container can hit weight limits before it fills with concrete, and metal is heavier still. Plan for this.
On-Site Versus Off-Site Sorting Decisions
You have two paths: sort on-site or commingled sorting.
On-site sorting means you separate waste streams into different containers at the project location. Workers sort as they work. You need multiple containers and space. Benefits: higher material recovery, lower disposal costs, cleaner loads at the facility.
Off-site or commingled sorting means you throw mixed waste into one or two containers. A recycling facility sorts it later. Benefits: simpler on-site logistics, fewer containers needed, faster initial cleanup.
The trade-off is real. On-site sorting requires discipline, training, and space; commingled sorting is easier upfront but costs more and recovers less. For tight spaces or short durations, commingled might make sense.
Patriot Solutions can help you choose the right approach for your project size and timeline.
Hazardous Construction Waste Disposal Regulations and Compliance
Hazardous materials require licensed disposal. Breaking the rules costs money and creates liability.
Asbestos cannot be disposed of in standard dumpsters. Hire a licensed abatement contractor. They handle removal, containment, and disposal.
Lead paint requires containment during removal. The EPA RRP Rule (Renovation, Repair, and Painting) applies to homes built before 1978. Use certified lead-safe contractors.
Refrigerants and oils must be recovered by licensed technicians. They cannot be released to the atmosphere. Improper disposal triggers federal fines.
Batteries and electronics go to certified e-waste recyclers, not landfills.
Treated wood (pressure-treated or chemically treated) cannot be burned and requires special disposal at facilities that accept it.
Know your local regulations, some states and counties are stricter than federal minimums. Check with your local environmental agency or waste hauler before starting work.
Measuring Waste Diversion and Reducing Costs
Tracking what you recover tells you whether your sorting system works. It also identifies cost savings.
Measure by weight or volume. Track how much material goes to recycling versus the landfill. Calculate your diversion rate: (material recycled / total waste) × 100.
Common benchmarks:
- General construction projects: 50-60% diversion
- Demolition with aggressive recovery: 70-80% diversion
- Projects with minimal sorting: 20-30% diversion
Cost reduction comes from:
- Selling scrap metal and other recoverable materials
- Reducing landfill tipping fees (smaller loads)
- Avoiding overage charges (right-sized containers)
- Preventing contamination fines (clean loads)
Track these numbers:
- Total waste volume or weight
- Material recovered by type
- Hauling costs
- Disposal and tipping fees
- Recycling revenue (if any)
Over time, you'll see patterns. You'll know which waste streams have value and which don't. You'll optimize your containers and staffing for better results.
Common Sorting Mistakes and How to Avoid Them
Most teams make the same mistakes. Learning from them saves time and money.
Mistake 1: No plan before work starts. You rent containers, workers throw everything in, and nothing gets sorted.
Mistake 2: Containers too far from work. Workers take the easy path and dump in the wrong bin.
Mistake 3: Unclear or missing signage. Workers guess. Prevention: use large, visual signs with examples and color coding.
Mistake 4: Mixing hazardous materials with regular waste. This contaminates entire loads and creates liability.
Mistake 5: Overfilling containers. Spillage, safety risks, and extra fees. Prevention: monitor containers daily.
Mistake 6: No accountability. If nobody owns sorting, it doesn't happen.
Mistake 8: Not communicating with your hauler. Your recycler rejects contaminated loads.
Frequently Asked Questions
What are the main construction and demolition waste streams I should sort?
The primary waste streams are concrete, metal, wood, drywall, masonry, and general waste. Concrete and metal have high recyclable value and should be separated immediately. Wood can be reused or chipped for mulch. Drywall requires separate handling due to gypsum content. Masonry and brick are recyclable but heavy. Commingled waste that mixes these materials reduces diversion rates and increases disposal costs. Identifying these streams before work begins makes sorting faster and more profitable.
How do I create an effective construction waste management plan template for my project?
Start by identifying all waste streams your project will generate. Assign specific roles: who manages sorting, who monitors containers, who schedules hauler pickups. Define where containers will be staged and how workers access them. Set clear labeling standards so contamination is obvious. Document your plan in writing and share it with your crew during a safety briefing. Update the plan if waste volumes or material types change. This template becomes your audit record and helps you measure waste diversion performance and control disposal costs.
What materials should never be mixed in a construction dumpster?
Hazardous materials like asbestos, lead-based paint, oils, solvents, and batteries must never enter standard dumpsters. Concrete and heavy masonry should not mix with lighter recyclables to avoid compaction damage. Wet materials contaminate dry recyclables. Food waste and general refuse contaminate construction debris. Mixing these materials forces the entire dumpster load to the landfill rather than recycling facilities. Separate bins and clear signage prevent costly contamination. When in doubt, consult your hauler about appropriate disposal sites for unusual or regulated materials.
How does sorting construction waste reduce my overall project costs?
Sorted waste diverts recyclable materials from expensive landfill disposal, lowering hauling costs. Segregating heavy materials like concrete and metal into dedicated bins reduces dumpster weight and may eliminate overage fees. Reusable materials like wood and metal can be sold for salvage value. Proper source separation means fewer container swaps and less labor spent managing contaminated loads. Planning waste streams before work begins prevents last-minute sorting that wastes worker time. Most projects reduce disposal costs by 15-30% through effective sorting and material recovery.