 how-to
How to Decorate Portable Restroom Trailers for Weddings
Table of Contents
- Portable Restroom Trailer Wedding Setup: What to Confirm Before You Decorate
- Wedding Restroom Trailer Decor Ideas That Hold Up Outdoors
- How to Disguise a Portable Restroom Trailer Without Damaging It
- Wedding Bathroom Basket Essentials for Guests
- Step-by-Step Decorating Plan for the Trailer Interior and Exterior
- Weather, Accessibility, and Inclusive Comfort
- Budget and Sourcing Checklist for Restroom Trailer Décor
- Frequently Asked Questions
Last Updated: October 8, 2026
Portable Restroom Trailer Wedding Setup: What to Confirm Before You Decorate
Decorating portable restroom trailers starts with the setup, not the ribbon and roses. Get the power, water, and placement right first, and the pretty parts go in without a fight. At Patriot Solutions, we rent and service portable restroom trailers across the Delta area, and we've watched great décor ideas fall apart because nobody checked the site first.
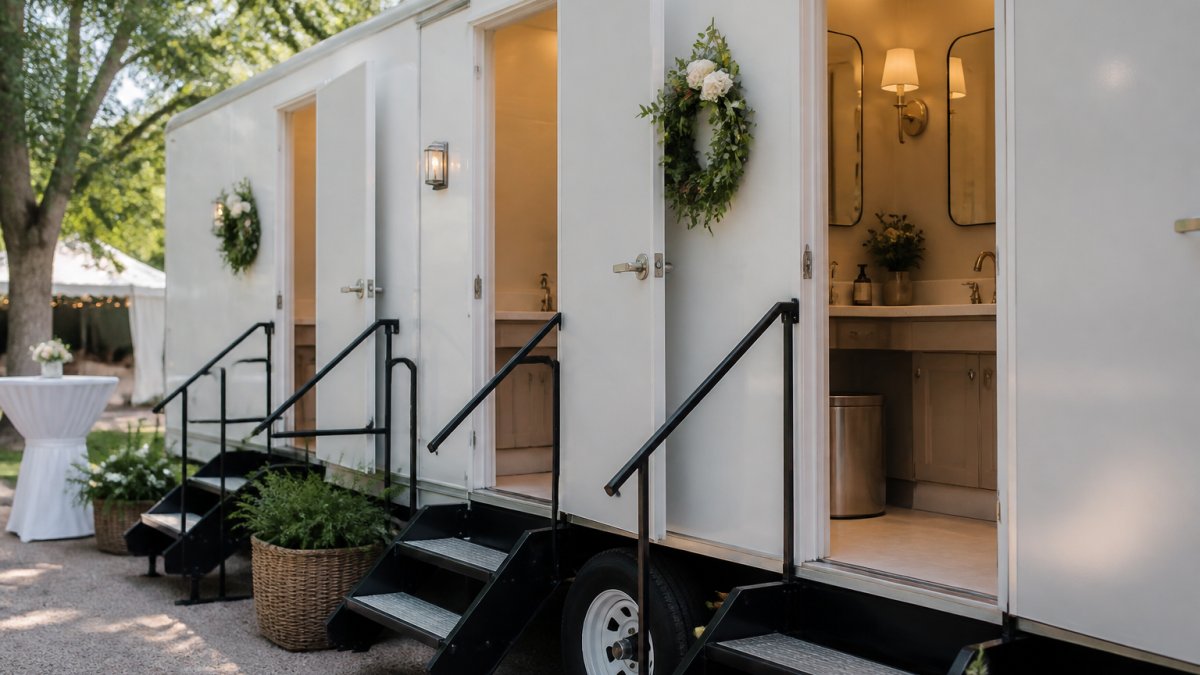
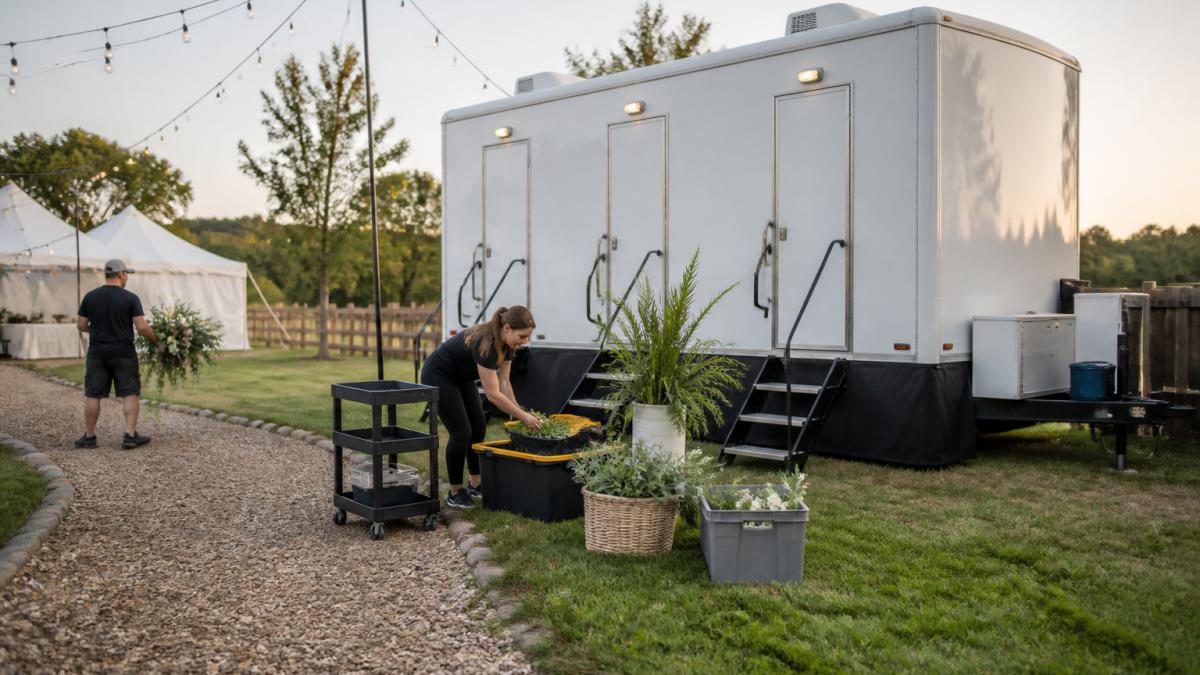
A portable restroom trailer is a towable restroom unit with flushing toilets, running water, sinks, and mirrors, built to bring indoor-style comfort to an outdoor event. That matters at a wedding, where guests are dressed up and expect a clean, private space.
Power, Water, and Site Access
Most trailers need a power source and a water hookup or onboard tank. Confirm three things before you buy a single vase:
- Where the power connects, and whether you need a generator or an outlet
- Whether the trailer runs on a fresh water tank or a hose hookup
- That the tow vehicle can reach the spot without tearing up the lawn
Positioning and Guest Flow
Place the trailer within easy walking distance of the reception, but not in the middle of it. You want a clear, well-lit path guests can find without asking. Keep the entrance facing away from the head table so traffic doesn't cut through dinner.
Wedding Restroom Trailer Decor Ideas That Hold Up Outdoors
Wedding restroom trailer decor ideas work best when they match the event's style instead of fighting it. A black-tie wedding calls for soft lighting and roses. A rustic outdoor event suits lanterns, greenery, and warm string lights. Pick one look and repeat it.
A few ideas that survive wind, heat, and foot traffic:
- Soft lighting from battery fairy lights or LED lanterns
- Faux plants and greenery that won't wilt by cocktail hour
- A framed sign welcoming guests
- A small tray of hand soap in a pump bottle
- A floral scent diffuser for freshness
How to Disguise a Portable Restroom Trailer Without Damaging It
Disguising portable restroom trailers comes down to covering the outside without touching the finish. Never drill, tape, or staple into the trailer's exterior or interior panels. Use freestanding screens, fabric draping on frames, or potted plants around the base.
What most guides miss is the entrance. A simple fabric swag over the door frame, hung on a freestanding arch, hides the industrial look without a single mark on the unit. Add a welcome sign and a small rug, and guests barely notice what's underneath.
- Freestanding lattice or fabric screens on both sides
- Potted greenery or small trees at the corners
- A fabric arch or drape over the entrance
- Pathway lights leading guests in
- A small welcome sign on a stand
Keep all décor removable. Anything attached to the trailer risks a damage charge and can void your rental agreement.
Wedding Bathroom Basket Essentials for Guests
Wedding bathroom basket essentials are the small comforts guests actually reach for. A well-stocked basket shows you thought about them. Keep it simple and refill it during the event.
Stock these items:
- Hand soap in a pump bottle
- Lotion and hand sanitizer
- Hairspray and bobby pins
- Breath mints
- Pain reliever
- Bandages
- Tissues and lint roller
- A small mirror for touch-ups
Step-by-Step Decorating Plan for the Trailer Interior and Exterior
Most guides hand you a mood board and stop there. What they skip is the order of operations, the sequence that keeps you from smudging a mirror you just cleaned or dragging a rug through fresh greenery clippings. Follow this plan top to bottom. A standard two-stall trailer takes about 60 to 90 minutes with two people.
| Step | Task | Time | Who |
|---|---|---|---|
| 1 | Site check and surface prep | 15 min | Setup crew |
| 2 | Exterior disguise and pathway | 20 min | Setup crew |
| 3 | Interior lighting and greenery | 20 min | Setup crew |
| 4 | Counter, mirror, and basket styling | 15 min | Setup crew |
| 5 | Entrance finish and final walkthrough | 15 min | Event host |
Step 1: Site Check and Surface Prep
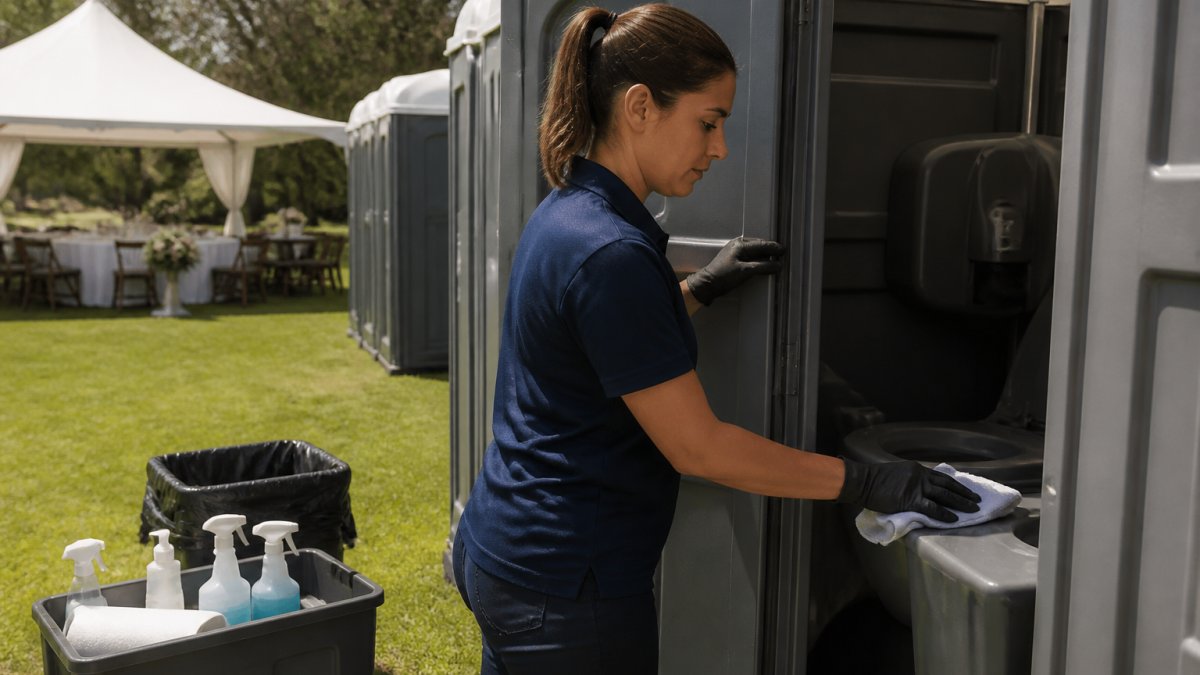
Before anything decorative goes in, confirm the trailer is level and the door swings freely. Wipe down counters, mirrors, sinks, and floors with a mild cleaner. A clean trailer makes every decoration look better. Test the flushing toilet, running water, and any interior lights before you add a single item, troubleshooting is easier with an empty room.
Step 2: Exterior Disguise and Pathway
Work outside first so you are not tracking grass and dirt back through a finished interior. Set freestanding screens or lattice panels on both sides of the trailer, then place potted greenery or small trees at the corners. Anchor the pathway lights along the guest route. Leave at least 36 inches of clear width on the path and keep the ramp and doorway completely unobstructed.
Step 3: Interior Lighting and Greenery
Add soft lighting before greenery so you can see where shadows fall. Battery-operated fairy lights and LED lanterns give a warm glow without cords that could trip a guest. Drape faux vines along the counter edge or mirror frame using removable adhesive hooks rated for the weight, never tape directly to painted or laminate surfaces. Keep all cords and battery packs off the floor.
Step 4: Counter, Mirror, and Basket Styling
Set out the soap pump, the guest basket, and a small scent diffuser. Place a framed sign or a small mirror on the counter, but leave the sink basin and faucet clear. If you use a tray, choose one with a non-slip base so it does not slide when the trailer shifts.
Step 5: Entrance Finish and Final Walkthrough
Hang the entrance drape on a freestanding arch, not on the trailer frame, then place the welcome sign and rug. Walk the full guest path in low light to check for trip hazards, then run the final restock checklist.
Weather, Accessibility, and Inclusive Comfort
Weather and access decide whether your décor survives the day. Wind will take loose fabric. Rain will ruin paper signs. Anchor everything and use weighted bases.
Wind and Rain Protection
Assume gusts will hit an open field harder than your backyard. Weighted bases, sandbags, water-filled weights, or concrete planters, hold freestanding screens and arches far better than stakes alone. For fabric drapes, choose a heavier weave and secure the bottom hem so it cannot whip. Skip paper signage outdoors; use laminated, acrylic, or metal signs instead. If rain is in the forecast, position the welcome sign and rug under the trailer's awning or a separate canopy, and bring the guest basket inside the trailer rather than leaving it on an exposed table.
Power for Lighting
Battery-operated fairy lights and LED lanterns avoid the need for an outdoor outlet entirely, which matters at venues without power at the restroom site. If you do run corded lighting, confirm the trailer's power source can handle the added load and keep every connection off the ground and out of standing water. A common pattern is to use battery lighting for the pathway and reserve any corded power for the trailer interior.
Uneven Ground and Safe Pathways
Level the trailer before decorating, a unit that rocks underfoot is a hazard, not just an annoyance. The guest path should be firm, wide enough for two people to pass, and lit from the reception to the trailer door. Gravel, packed turf, or interlocking mats all work; loose sand and bare mud do not.
Accessibility and Inclusive Comfort
Accessibility matters just as much as aesthetics. Keep the pathway wide and firm enough for wheelchairs and walkers, and leave the grab bars and interior floor space clear. Do not place décor in the doorway, on the ramp, or within the turning radius inside the trailer. Choose décor that does not obstruct mobility: low-profile rugs instead of thick pile, wall-mounted or counter-top items instead of floor-standing pieces, and clear, readable signage in high-contrast lettering for guests with low vision.
Setup, Maintenance, and Teardown
Decide before the event who installs the décor, who replenishes supplies during the reception, and who removes everything afterward. A common pattern is to assign one person to check the trailer every 60 to 90 minutes for cleanliness and restocking, and to schedule teardown for the morning after so nothing is rushed in the dark. Confirm with your rental provider what must be removed before pickup and what can stay.
Budget and Sourcing Checklist for Restroom Trailer Décor
A realistic budget keeps you from overspending on things guests never notice. Spend on lighting and cleanliness first, then add the extras.
- Set a total décor budget before shopping
- Price lighting, greenery, and signage
- Buy faux over fresh for anything outdoors
- Confirm every item is freestanding or removable
- Assign one person to restock during the event
- Plan teardown and who removes each item
Pricing for the trailer itself depends on quantity, dates, and delivery. Reach out to Patriot Solutions for current rates and a quote.
Frequently Asked Questions
How do you make a portable restroom trailer look nice for a wedding?
Start with a clean trailer, then add soft lighting such as battery-operated fairy lights or lanterns along the entrance. Use faux or real flowers and greenery on the vanity and around the door frame, and keep the interior tidy with a small basket of hand soap and hand towels. Coordinate colors with the wedding style, whether that is black-tie, rustic, or garden. Because portable restroom trailers have running water, a flushing toilet, and a mirror, these small touches make the space feel upscale without much effort.
How can you disguise a portable restroom trailer at a wedding?
You can disguise a portable restroom trailer by framing the entrance with greenery, fabric draping, or a simple wooden screen that does not block vents or doors. Position the trailer behind a tent, hedge, or decorative panel so it blends with the venue. Add pathway lights and a small sign so guests can find it easily. Avoid attaching anything with nails or strong adhesive; use zip ties, removable hooks, or weighted bases instead to protect the trailer.
What should you put in a wedding bathroom basket for guests?
A wedding bathroom basket should include practical items guests may need during the event: hand soap in a pump bottle, hand towels or paper towels, a small floral scent, and a wastebasket. Add extras like hairspray, safety pins, pain reliever, and mints. Keep the basket small and refill it during the reception. If the trailer has a sink and faucet, place the basket on the counter so it is easy to see and use.
How many portable restrooms do you need for a 100-person wedding?
The number of portable restrooms needed depends on event length, whether alcohol is served, and if the ceremony and reception are in the same location. A portable restroom trailer with running water and a flushing toilet often serves more guests comfortably than basic units, so ask your rental provider for a recommendation based on your guest count and schedule.
Planning a wedding means juggling a hundred details, and the restroom is the one guests judge quietly. Patriot Solutions makes that part easy with clean equipment, fast delivery, and dependable local service across the Delta area. We stock flushing toilets, running water, and well-kept interiors so your décor has a solid base to build on. Get started with Patriot Solutions and give your guests a restroom they'll never think twice about.