 how-to
Secure Portable Toilets During High Winds: Step-by-Step Guide
Table of Contents
- Why Portable Toilets Tip Over in High Winds
- Portable Toilet Placement in High Winds
- How to Anchor a Portable Toilet
- Portable Toilet Storm Preparation Checklist
- What to Do If a Porta Potty Tips Over
- Post-Storm Inspection and Safe Reopening
- Conclusion
- Frequently Asked Questions
Last Updated: October 21, 2026
Why Portable Toilets Tip Over in High Winds
Secure portable toilets high winds by understanding why they tip over: they're tall, lightweight, and sit on a small footprint.
Even moderate gusts can destabilize an unsecured unit in an open area with no windbreaks.
Prevention requires planning before the weather turns bad.
Why this matters: A tipped porta potty creates a sanitation hazard, damages the unit, and leaves your site without working facilities. Prevention is far easier than the aftermath.
Portable Toilet Placement in High Winds
Placement matters as much as securing the unit.
Choose a sheltered location:
- Place units near buildings, fences, or natural windbreaks, on the downwind side of structures when possible
- Avoid open fields or exposed areas where wind has nothing to slow it down
- On flat, open sites, create a temporary windbreak with tarps or barriers
Orientation of the door:
- Face the door away from prevailing winds to reduce force against the entry
- Check local wind patterns before placement
Avoid these placement mistakes:
- Don't place units on slopes, isolated far from other structures, or exposed on multiple sides
Surface conditions affect stability: soil is generally better than pavement for anchoring because stakes and rebar can penetrate the ground; on pavement, you'll need different methods (covered below).
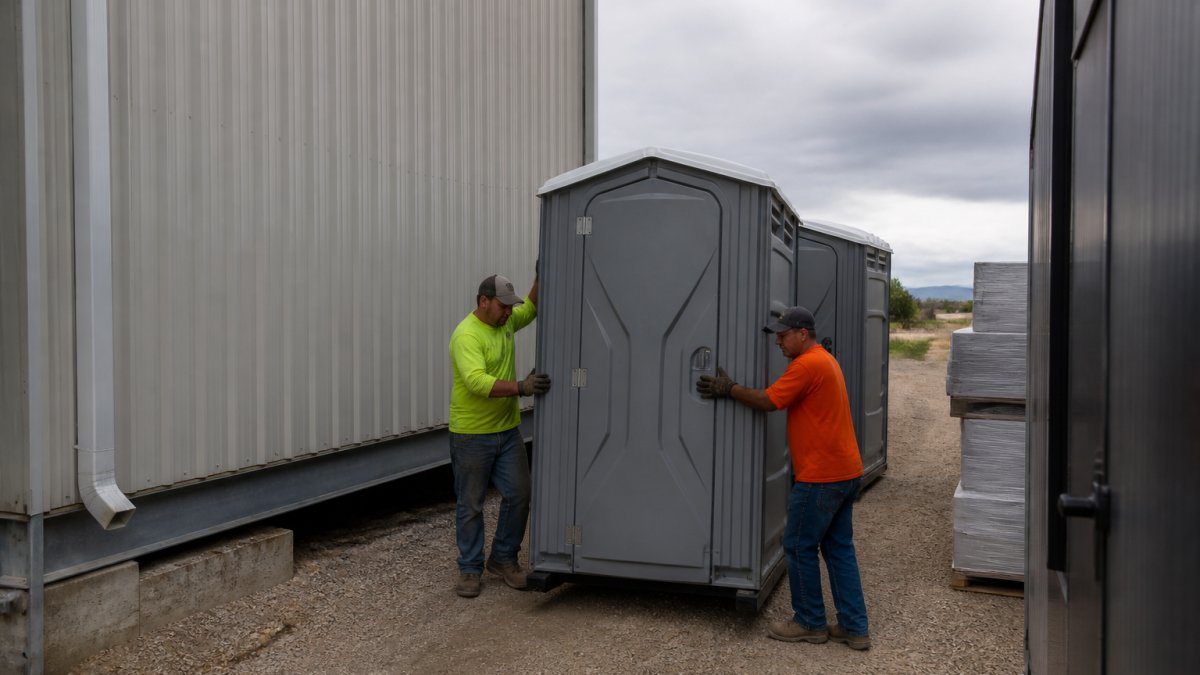
How to Anchor a Portable Toilet
Anchoring is the single most important step in learning how to secure portable toilets high winds and keep them upright. The right method depends on surface, soil condition, and wind exposure, use the guide below, then follow the steps for that surface.
Anchor Selection by Surface and Soil Condition
| Surface | Recommended method | When it is unsuitable |
|---|---|---|
| Firm, undisturbed soil or compacted gravel | Steel rebar or auger-style ground anchors driven 12-18 inches, plus rated straps | Loose fill, sand, or recently disturbed soil that will not hold an anchor under load |
| Asphalt | Screw-in anchors sized for the pavement thickness, or weighted ballast if the pavement is thin or degraded | Thin overlay, cracked, or patched asphalt that cannot develop holding strength |
| Concrete | Adhesive or expansion anchors installed per the manufacturer, or heavy ballast when drilling is not permitted | Post-tension or hollow-core slabs where drilling is prohibited or risky |
| Decking, turf protection mats, or temporary surfaces | Ballast plus straps to a separate fixed object, or relocation to a more suitable surface | Any surface that cannot accept an anchor and has no nearby fixed attachment point |
Treating soil and gravel as anchor-friendly and pavement as anchor-hostile is a starting point, not a rule: compacted gravel can hold an auger anchor, loose sand cannot, and thin asphalt can fail under a screw anchor. When in doubt, ask the rental provider what anchor type they recommend, and don't substitute a method the manufacturer hasn't rated for the unit.
Anchoring on Soil with Stakes and Rebar
On soil, stakes and rebar penetrate the ground and resist tipping.
Steps:
- Locate the anchor points. Most portable toilets have four on the underside or corners. Check the unit's documentation or ask your rental provider before attaching anything.
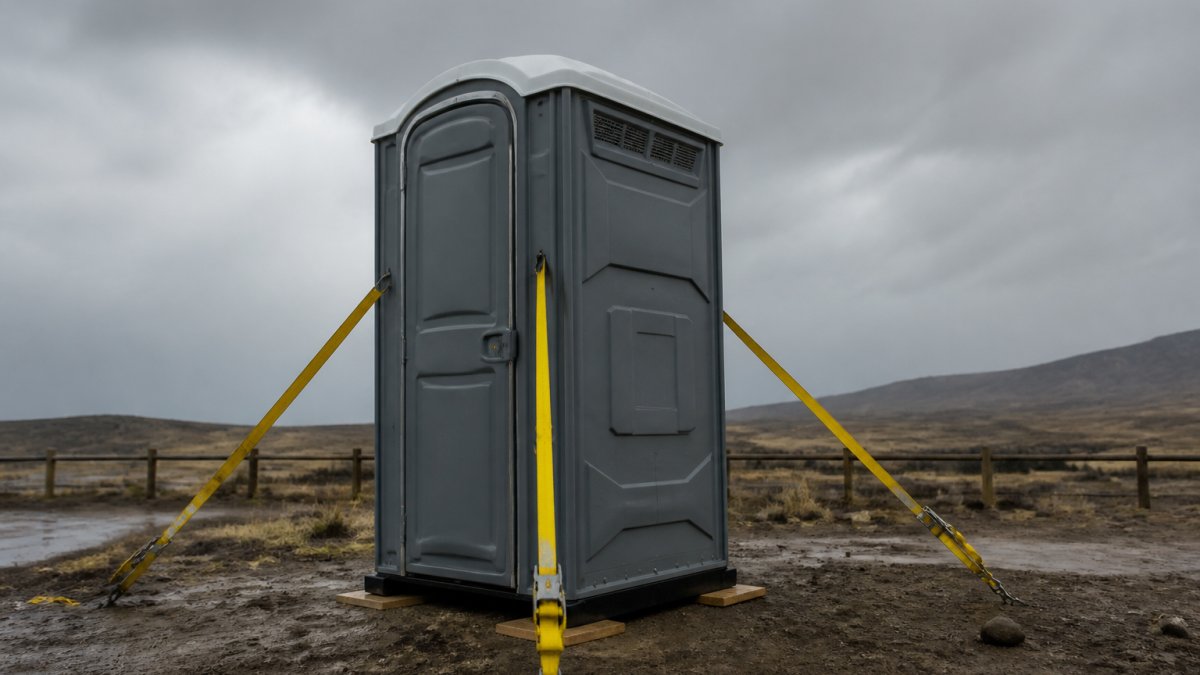
- Drive the anchors. Insert stakes or rebar at least 12-18 inches into firm soil, angled slightly away from the unit so strap tension pulls against undisturbed ground. Rebar resists bending under load.
- Attach rated straps. Connect heavy-duty straps from the unit's anchor points to the stakes, following the strap maker's working-load limit rather than guessing.
- Tension and test. Pull each strap snug and push on the unit from all four sides; it should not shift or rock. Re-tension after the first hour, because soil settles and straps stretch.
Why this works: The anchors create a fixed point in the ground, and the straps transfer wind force into the soil. The weak link is almost always the soil, not the strap, loose or sandy ground needs a different approach or professional help.
Anchoring on Pavement with Screw Anchors
Pavement doesn't allow stakes to penetrate, so screw anchors or ballast take over.
Steps:
- Confirm the pavement can hold an anchor. Thin asphalt, cracked concrete, and patched surfaces may not develop enough holding strength. If unsure, use ballast instead or consult the rental provider.
- Install screw anchors. Twist them in with a drill or wrench per the manufacturer's instructions. Do not over-torque, which can strip the hole.
- Space anchors around the unit. Place at least four, one near each corner, so the load is balanced.
- Attach and tension rated straps. Connect the unit to each anchor with straps rated for the load, and tighten until there is no slack.
- Test stability. Push on the unit to confirm it does not rock or shift. Re-check after the first round of gusts.
Important: If the pavement is questionable, ballast plus straps to a separate fixed object is often safer.
Using Heavy-Duty Straps and Tie-Downs
Straps connect the unit to the ground anchors, so their rating matters as much as the anchors.
What to look for:
- Straps rated by the manufacturer for the load, with the working-load limit printed on the strap
- UV-resistant webbing to prevent sun degradation
- Ratchets or buckles that lock and do not slip under vibration
Installation:
- Attach one end to the unit's rated anchor point.
- Route the strap to the ground anchor without sharp bends that can cut the webbing.
- Tighten with the ratchet or buckle until there is no slack.
- Check tension after the first hour and again before the storm arrives.
Common mistake: Using old, worn, or underrated straps. If the webbing looks faded, frayed, or stiff, replace it, a failed strap means a failed anchor system.
Adding Ballast with Sandbags
Sandbags add weight and lower the center of gravity, raising the wind force needed to tip the unit. They work best combined with straps and anchors.
How to use sandbags:
- Place bags on the base or footprint, distributed evenly so the load is balanced.
- Use enough to make a real difference, a common pattern is four to six bags of 25-50 pounds each, but follow the manufacturer's guidance.
- Keep bags clear of the door swing and access path so they don't become trip hazards.
Why it helps: Extra weight lowers the center of gravity and increases the force required to tip the unit. Sandbags alone won't stop a strong gust, so always pair them with proper anchoring.
Safe Installation and Load Considerations
Anchoring hardware is only as safe as its installation. A few habits prevent common failures:
- Follow the manufacturer's ratings. Stay within published working-load limits, and don't mix hardware from different systems unless the makers confirm compatibility.
- Protect the unit. Attach straps only to load-rated points. Over-tightening can crack the plastic shell, and drilling new holes voids many warranties and weakens the unit.
- Manage trip hazards. Route straps close to the ground and flag or cover them where people walk. Keep sandbags out of the door path.
Portable Toilet Storm Preparation Checklist
Use this checklist before severe weather arrives, it's built around decisions, so you know when to add anchoring, when to relocate, and when to call the rental provider.
Wind-Speed Decision Guidance
No single wind speed is a universal tipping threshold, unit design, ballast, surface, and exposure all change the answer. Still, you need decision points:
- Forecast gusts approaching the manufacturer's rated wind limit: inspect and re-tension all anchors and straps, add ballast if the unit is on pavement, and confirm the door is secured. Do not wait for the first gust.
- Forecast gusts above the rated limit, or a severe-weather warning for the site: restrict access, relocate units to a sheltered area if time allows, and notify the rental provider. If relocation isn't possible, add redundant anchoring and keep people away until the weather passes.
- Sustained high winds already on site: do not send staff out to adjust anchors during the worst of the wind. Secure the area, keep users away, and wait for conditions to ease before inspecting.
The manufacturer's rating for your specific unit, combined with the site's exposure, is the number that matters.
Site Inspection
- Verify all anchor points are secure and undamaged
- Check that straps are tight and not frayed or torn
- Confirm ground anchors or screw anchors are properly installed for the surface
Equipment Check
- Inspect straps for UV damage or wear, and confirm the working-load limit is legible
- Verify rebar or stakes are fully driven into firm soil
- Test that screw anchors do not rotate or shift
Final Walkthrough
- Push on the unit from all four sides to test stability
- Look for visible gaps or movement between the unit and anchors
- Document the setup with photos (helpful if damage occurs)
Event and Jobsite Coordination
Anchoring is a shared responsibility, and the most common failure is nobody owning it. Before the event or shift:
- Assign an owner. Name the person responsible for anchor checks, re-tensioning, and access decisions, and put it in writing.
- Coordinate with the rental provider. Confirm who installs and inspects anchors, the severe-weather policy, and whether they will relocate or recover units after a storm.
- Plan for alerts. Sign up for local severe-weather alerts and set a trigger, a forecast gust threshold or an official warning, that starts the preparation checklist.
During the Storm
- Do not use the portable toilet if winds are extreme or an official warning is in effect for the site
- Keep users away from units until winds subside
- If possible, relocate units indoors or to a more sheltered area before the worst of the wind
What to Do If a Porta Potty Tips Over
If a portable toilet tips over despite your precautions:
Immediate steps:
- Secure the area. Keep people away from the tipped unit immediately.
- Do not attempt to right it yourself. A tipped portable toilet is heavy and unstable. Wait for professional help.
- Contact your rental provider immediately. They have equipment and trained staff to safely recover the unit.
- Document the incident. Take photos of the tipped unit and surrounding area. Note the wind conditions and any damage.
Safety considerations:
- A tipped unit may have spilled waste, creating a biohazard
- The unit may be unstable and could shift further
- Never let untrained people attempt to move or right the unit
Prevention for next time:
- Review what failed: inadequate anchoring, poor placement, or extreme wind?
- Upgrade your anchoring system based on what happened
- Add more sandbags or use heavier straps
Key takeaway:
Post-Storm Inspection and Safe Reopening
After severe weather passes, inspect your portable toilets before anyone uses them again.
Inspection steps:
-
Check structural integrity. Look for cracks, dents, or damage to the walls or roof. Even small cracks can lead to leaks or larger problems.
-
Verify anchor systems. Inspect all straps, anchors, and tie-downs. Look for bent rebar, loose screws, or torn straps.
-
Test the door and lock. Open and close the door several times; it should operate smoothly and the lock should engage properly.
-
Inspect the interior. Look for debris, water damage, or spilled waste. If the unit tipped, the interior will need professional cleaning.
-
Check for leaks. Look under the unit for signs of waste leakage or water intrusion.
-
Verify ventilation. Make sure vents are clear and not blocked by debris.
If damage is found:
- Do not use the unit
- Contact your rental provider immediately
- Request a replacement or repair
Reopening safely:
- Only reopen units that pass inspection
- Re-tighten all anchor systems after the storm
- Replace any damaged straps or anchors before the next weather event
Warning:
Conclusion
Securing portable toilets during high winds requires smart placement, proper anchoring, and regular inspection. Choose sheltered locations, use ground or screw anchors depending on your surface, and add heavy-duty straps and sandbags for redundancy.
The effort you invest now prevents expensive damage, liability issues, and service interruptions later. At Patriot Solutions, we understand reliable sanitation is critical to your project or event.
Frequently Asked Questions
How do you keep a portable toilet from blowing over in high winds?
Secure portable toilets with multiple anchoring methods: drive stakes or rebar 2-3 feet into soil, use screw anchors on pavement, wrap heavy-duty straps around the unit and anchor points, and add sandbags for ballast. Position the unit behind windbreaks like buildings or trees, and orient the door away from prevailing winds. These combined steps prevent tipping even in strong wind gusts.
What wind speed requires securing a portable toilet?
Anchor portable toilets when sustained winds exceed 25 mph or when forecasts predict wind gusts above 35 mph. High-wind events, storms, and coastal or elevated locations demand immediate securing. If you're uncertain about local wind conditions, contact your rental provider or check weather forecasts before an event or work shift.
Can you move a portable toilet after it has been anchored?
Yes, but it requires careful planning. Remove all anchors, stakes, and sandbags before relocating. If the unit is heavily secured, contact your rental provider to handle the move safely. Never attempt to drag or force a secured portable toilet, as this can damage the unit or injure someone. Schedule moves during calm weather when possible.
What should you do immediately if a portable toilet tips over?
Evacuate the area and prevent anyone from using the unit. Contact your rental provider right away, do not attempt to right the unit yourself. Inspect the site for damage, contamination, or hazards. The provider will assess whether the unit can be cleaned and repositioned or needs replacement. Document the incident with photos for insurance and safety records.
When high winds threaten your event or construction site, proper portable toilet securing isn't optional, it's essential. Patriot Solutions provides clean, dependable portable restroom equipment paired with expert guidance on installation and weather preparation. Contact us today for a quote and consultation on securing your units for high-wind conditions.